
Good evening my lovelies!! It is quite late in my craft room this evening, but I simply must blog my FIRST of 3 games I very proudly made for the latest edition of Crafters Inspiration 5 magazine for Crafters Companion. When the girls on the design team were asked to submit ideas for the upcoming Christmas edition I decided to delve back into the days when I used to work in pre-school and designed 3 children's games, well you can imagine how OVER THE MOON I was, when I was chosen to be one of the DT gals to make my projects for the magazine! just amazing! ...now to turn my ideas into the REAL thing!, armed with lots of doodles and scibbles, from what I wanted to create, I set to making my first game
The Snowman Run Home For Christmas Game!
Now if you have the magazine you will see the finished piece, but here on my blog I can go into lots more detail and give you the step by step pictures in case you would like to give it go!
To make this game I used a graphic programme, for me, I mainly use My Craft Studio, its a brilliant programme, but you can just as easily use Serif, or Docrafts digital designer.( if you DONT use graphic programmes don't despair!! as long as you can print out the elements you can still make this game just tweak it for you!)

import your chosen backing paper into a graphic programme and re size to 14.5 x 21.5 cm then using a 2.5cm round digital punch, mark out your spaces, I've made 43 with the HOME circle being larger. Number all your spaces, but make sure you number every now and then in RED- ( land on a red number turn over a forfeit card! ) up to you how many red ones you choose to have!

NEXT- take 3 pieces of Crafters Companion Kraft card measuring 2 at 16.5 x 22.5 cm- score both of these at 15 cm to give you a 1.5 cm lip, and your 3rd piece needs to measure 15 x 22.5 cm- NO LIP on this one as it is the end piece.
Distress all the edges front and back ( its a VINTAGE game after all!) i've used Tim Holtz Walnut Stain, then using CC Red liner tape along both lips, join your 3 pieces together to make a tri folding board.
Distress all the edges front and back ( its a VINTAGE game after all!) i've used Tim Holtz Walnut Stain, then using CC Red liner tape along both lips, join your 3 pieces together to make a tri folding board.

Next take your 3 front panels, distress also and secure to your board base using collall tacky glue...its all starting to come together now!!
time to decorate!!

Print off a selection of toppers and run them through an embossing machine with the Crafters Companion folder Softly Falling
Distress them and glue into place on your board

FORFEIT CARDS! Here is where you can let your imagination run wild and have fun!
Take the post cards from your free cd rom and pop into your graphic programme, re size them, mine are A7 but its totally up to you its YOUR game, type on to each one your chosen forfeit, print and cut out

Distress the edge of each one, and then to line the back to not only make them pretty but also sturdy, emboss some Kraft card and glue each forfeit card to it, then cut each one out ( much easier than trying to back each piece!)

Voila! Forfeit cards! How fab are these!! Next you need playing pieces, here is where your fabulous free die comes in!

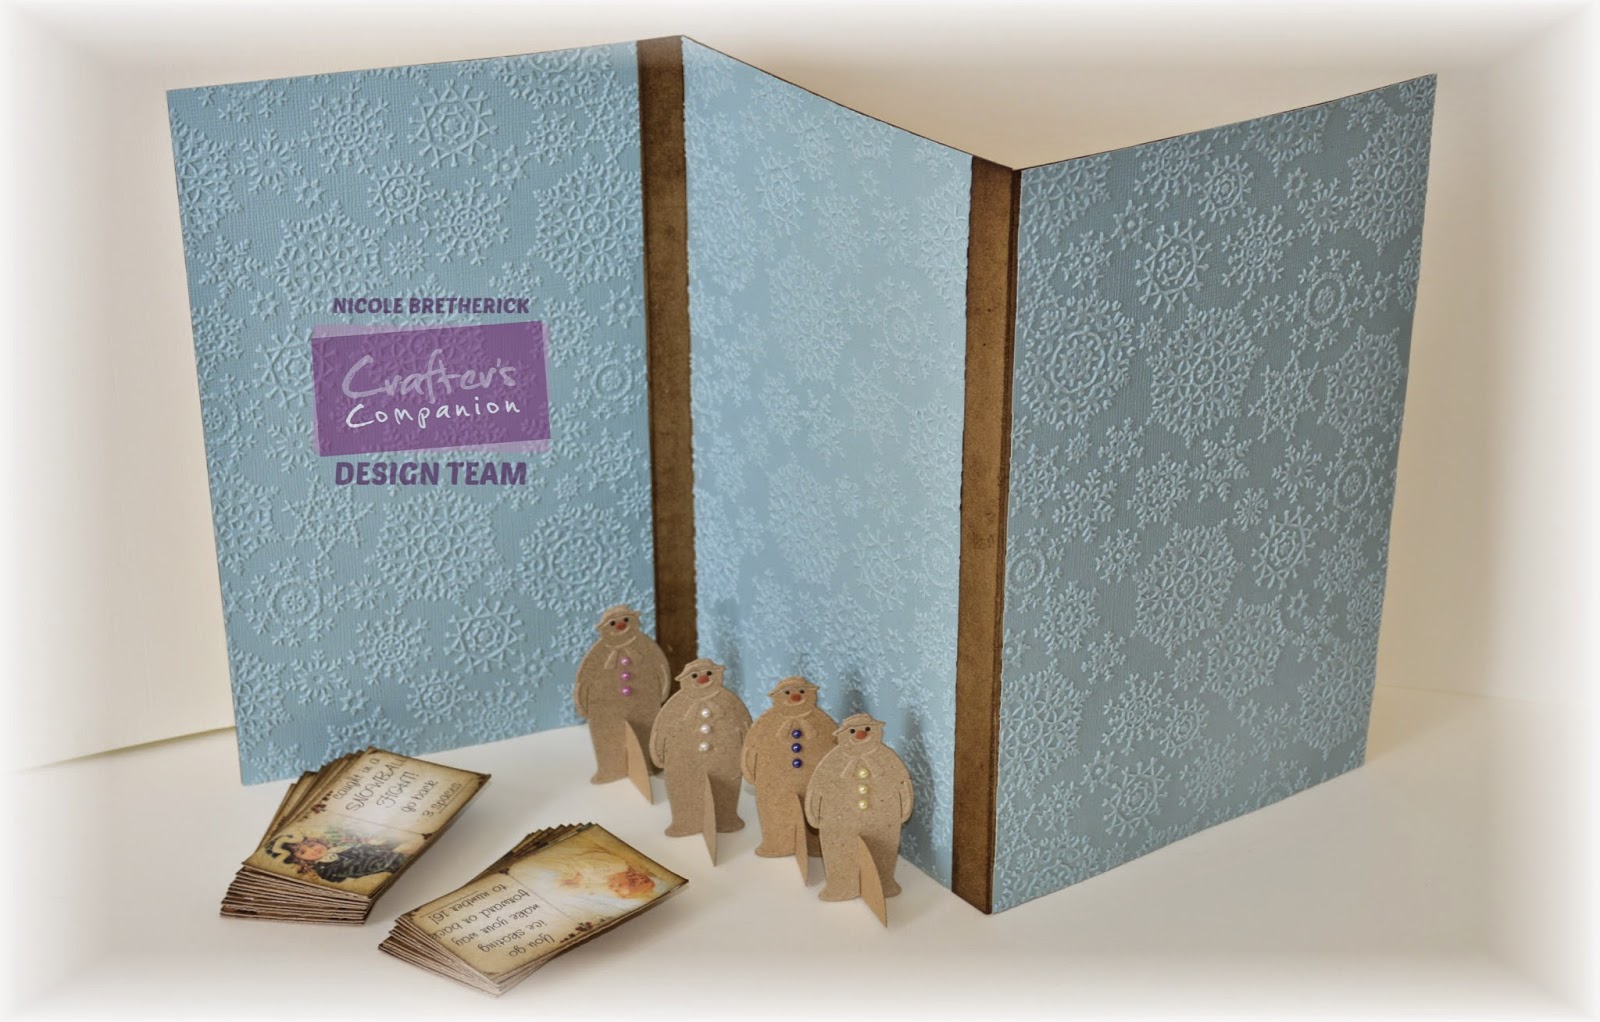
cut as many players as you would like to have, I've made a simple semi circular base with a couple of slits to make them slot together to stand, then decorate each a different colour, so you know whose piece is who!
To finish off I have taken some Core'dinations cards stock, embossed with Softly falling snow and lined the back of my board,
the final piece is to make your spinner! or if you prefer you could use some dice, I made a simple spinner using elements from the cd rom and a small wooden dowel,

No game would be complete with out a box!, again using some CC Kraft card, and my boxer board i made a box to fit my game, distressing the edges

I printed a piece of lovely vintage paper to decorate my lid that I embossed and glittered, then made a topper with my board name on!

I embossed more Core'dinations card stock to line the inside, then I printed out my game instructions, and secured them inside my box lid,

A Simple Die'Sire Snowflake die and some lashing of glitter to decorate

and there you go! One Vintage Snowman Game!, you can make your game as BIG as you like, maybe I'll try two pieces of A3 card next time with lots more forfeits too!
I have LOVED making this game i really did enjoy it, and I hope maybe you will give it a try!, with two more games to come I hope you will pop back this week to take a look at them!
Happy creating
Nicole
xxx
What an amazing project, well done for getting it featured in the magazine. I've not got my copy yet but am looking forward to it more than ever now.
ReplyDeleteAww thanks Jane!! The magazine is brilliant ! I'll be making the fudge this weekend xx
ReplyDeleteThis is so incredible Nicole, all the work has certainly paid off...I absolutely love this, all the detail & fab design....I bet you wanted to keep it lol Have a great day xxx
ReplyDeleteFantastic project Nicole, looks like a lot of fun! Well done on being featured!
ReplyDeleteHugs
Dawn xxx